Infinite-ISP Tutorial 2: Working with Infinite-ISP
Now that we’ve covered the fundamentals, let’s delve further into the Infinite-ISP open-source repository to uncover even more of its extensive features. This tutorial will walk you through various image processing tasks, including the configuration of Infinite-ISP class using customized or default parameter configuration for dataset or video processing, as well as enhancing image quality through the utilization of 2A modules.
Follow along to learn more on the following aspects of Infinite-ISP:
- 3A Render Mode – How to apply 3A ISP algorithm processing to a RAW image
- RAW Dataset Processing – How to process entire RAW image dataset
- Video Processing Mode: – How to process consecutive RAW images
Github repository: Infinite-ISP_ReferenceModel, Infinite-ISP_AlgorithmDesign
Note: The features listed above are available in both Reference Model (fixed point model) and Infinite-ISP_AlgorithmDesign (floating point model)
Exploring the Getting Started with Infinite ISP section is encouraged for individuals seeking a solid grasp of the basics of Infinite-ISP.
3A Render Mode
What is 3A?
In an ISP, 3A refers to the three ‘auto’ modules, namely auto white balance (AWB), auto exposure (AE) and auto focus (AF, not currently implemented in Infinite-ISP), which significantly contribute to the quality of the image an ISP delivers. AWB aims to achieve a natural-looking coloration in the output image whereas AE corrects the overall exposure and the resulting brightness of the captured scene. AF adjusts the lens to focus objects within the scene onto the image sensor pixel grid, ensuring that the objects in the scene appear clear and well-defined in the image.
2A in Infinite-ISP

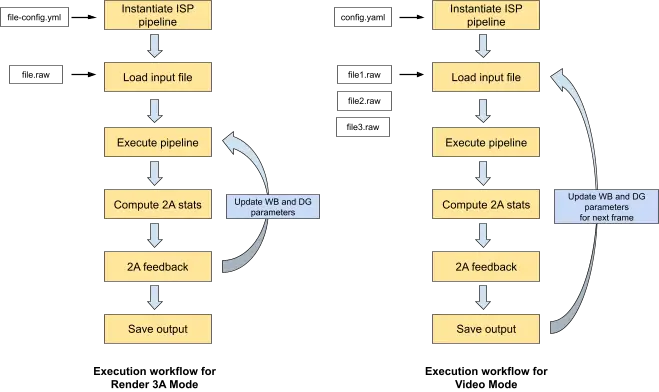
Infinite-ISP currently supports 2 out of the 3A modules i.e 2A: AE and AWB. It simulates the actual working of the 3A blocks in a hardware ISP using the 3A Rendering mode. Infinite-ISP implements 2A modules as a frame pass algorithm to fine-tune the respective parameters for optimal image quality based on 2A-STATS computed at various points/locations in the pipeline. The InfiniteISP class computes the 2A-STATS on the input image and provides feedback based on these statistics. This feedback is incorporated by updating the WB and DG module parameters in the config file based on the stats computed by AWB and AE modules respectively. The pipeline is executed iteratively using the updated configuration in each iteration. In hardware, the AE (Auto Exposure) module adjusts the image’s exposure by modifying image sensor exposure time, shutter speed, aperture, analog gain, digital gain and/or the ISP pipeline gain whereas Infinite-ISP models this behavior by modifying just the ISP pipeline gain (DG block). The 2A feedback can be found at the very end of the printed logs as shown in the image below. For example, in the “ISP Pipeline Execution Logs” sections of the Tutorial 1: Getting Started with Infinite-ISP, the 3A STATS block provides the exposure feedback i.e. ‘AE Feedback = Overexposed’. It indicates that image quality in terms of exposure can be improved by reducing the exposure (if possible). Similarly, AWB provides a better estimate of the R and B gain parameters than those applied on the current frame in WB block.

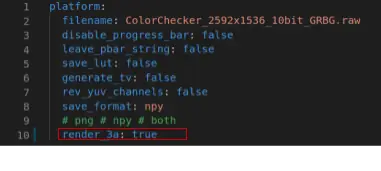
The 3A Render Mode updates digital gain and white balance gains in the config file based on feedback and re-runs the pipeline. This iterative process of WB correction by AWB and Exposure correction by AE, continues until both converge to a balanced state. The user can enable the 3A Render Mode in the ISP configuration file (configs.yml) using the render_3a flag as indicated in the image below.
The faster an ISP converges to the optimal exposure (AE), white balance (AWB) and focus (AF), the more effective its 3A algorithms are.
The 3A Rendering Mode in Infinite-ISP simulates the ISP 2A processing of a static scene, where the first frame is iteratively processed many times until convergence is achieved. This mode does not simulate a dynamically changing scene, where the objects and the scene (consequently the image sensor RAW input to ISP) is changing every next frame.
The final output (as a result of convergence from repetitive iterations) is saved in the ./out_frames directory.
Example
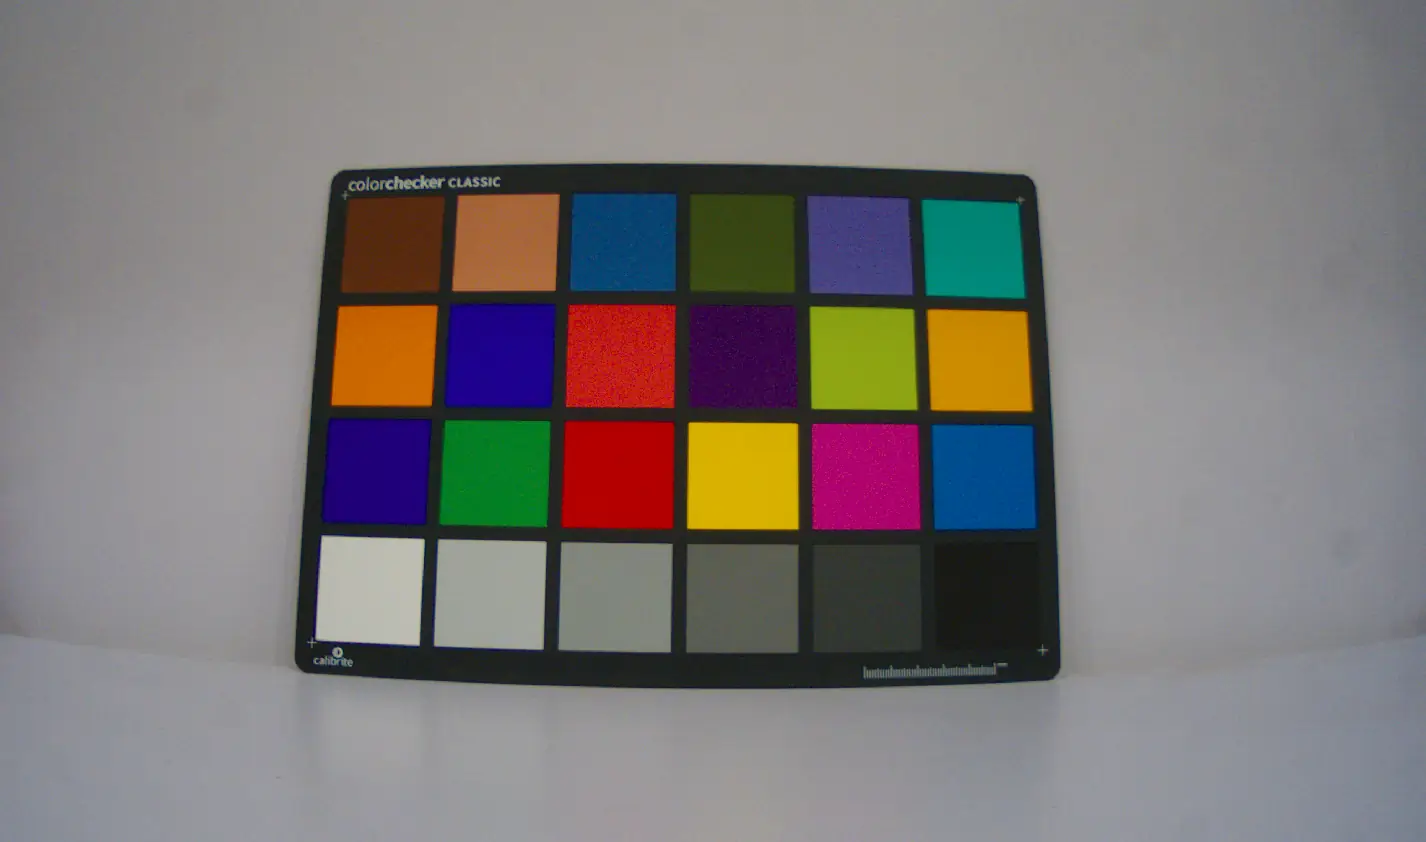
We will be using the sample raw image ColorChecker_2592x1536_10bit_GRBG.raw from the ./in_frame/normal directory, along with the default configuration file from the ./config directory
Because the parameters in the config file are already tuned for the provided input image, let’s disrupt them a little to produce inaccurate results first. This can be easily done by changing the configuration parameters as follows.
- Go to configs.yml in ./config directory
- Set render_3a flag to false
- Set the r_gain and b_gain to 1
- Set the current_gain parameter to 3 under the ‘digital gain:’ heading
- Run isp_pipeline.py file
Now let us enable the 2A modules in the pipeline and compare the results. For this, enable image rendering with the same parameter configuration to see the render-3A mode in action.
For this
- Go to configs.yml in ./config directory
- Set render_3a flag to true
- Set the r_gain and b_gain to 1
- Set the current_gain parameter to 3 under the ‘digital gain:’ heading
- Run isp_pipeline.py file
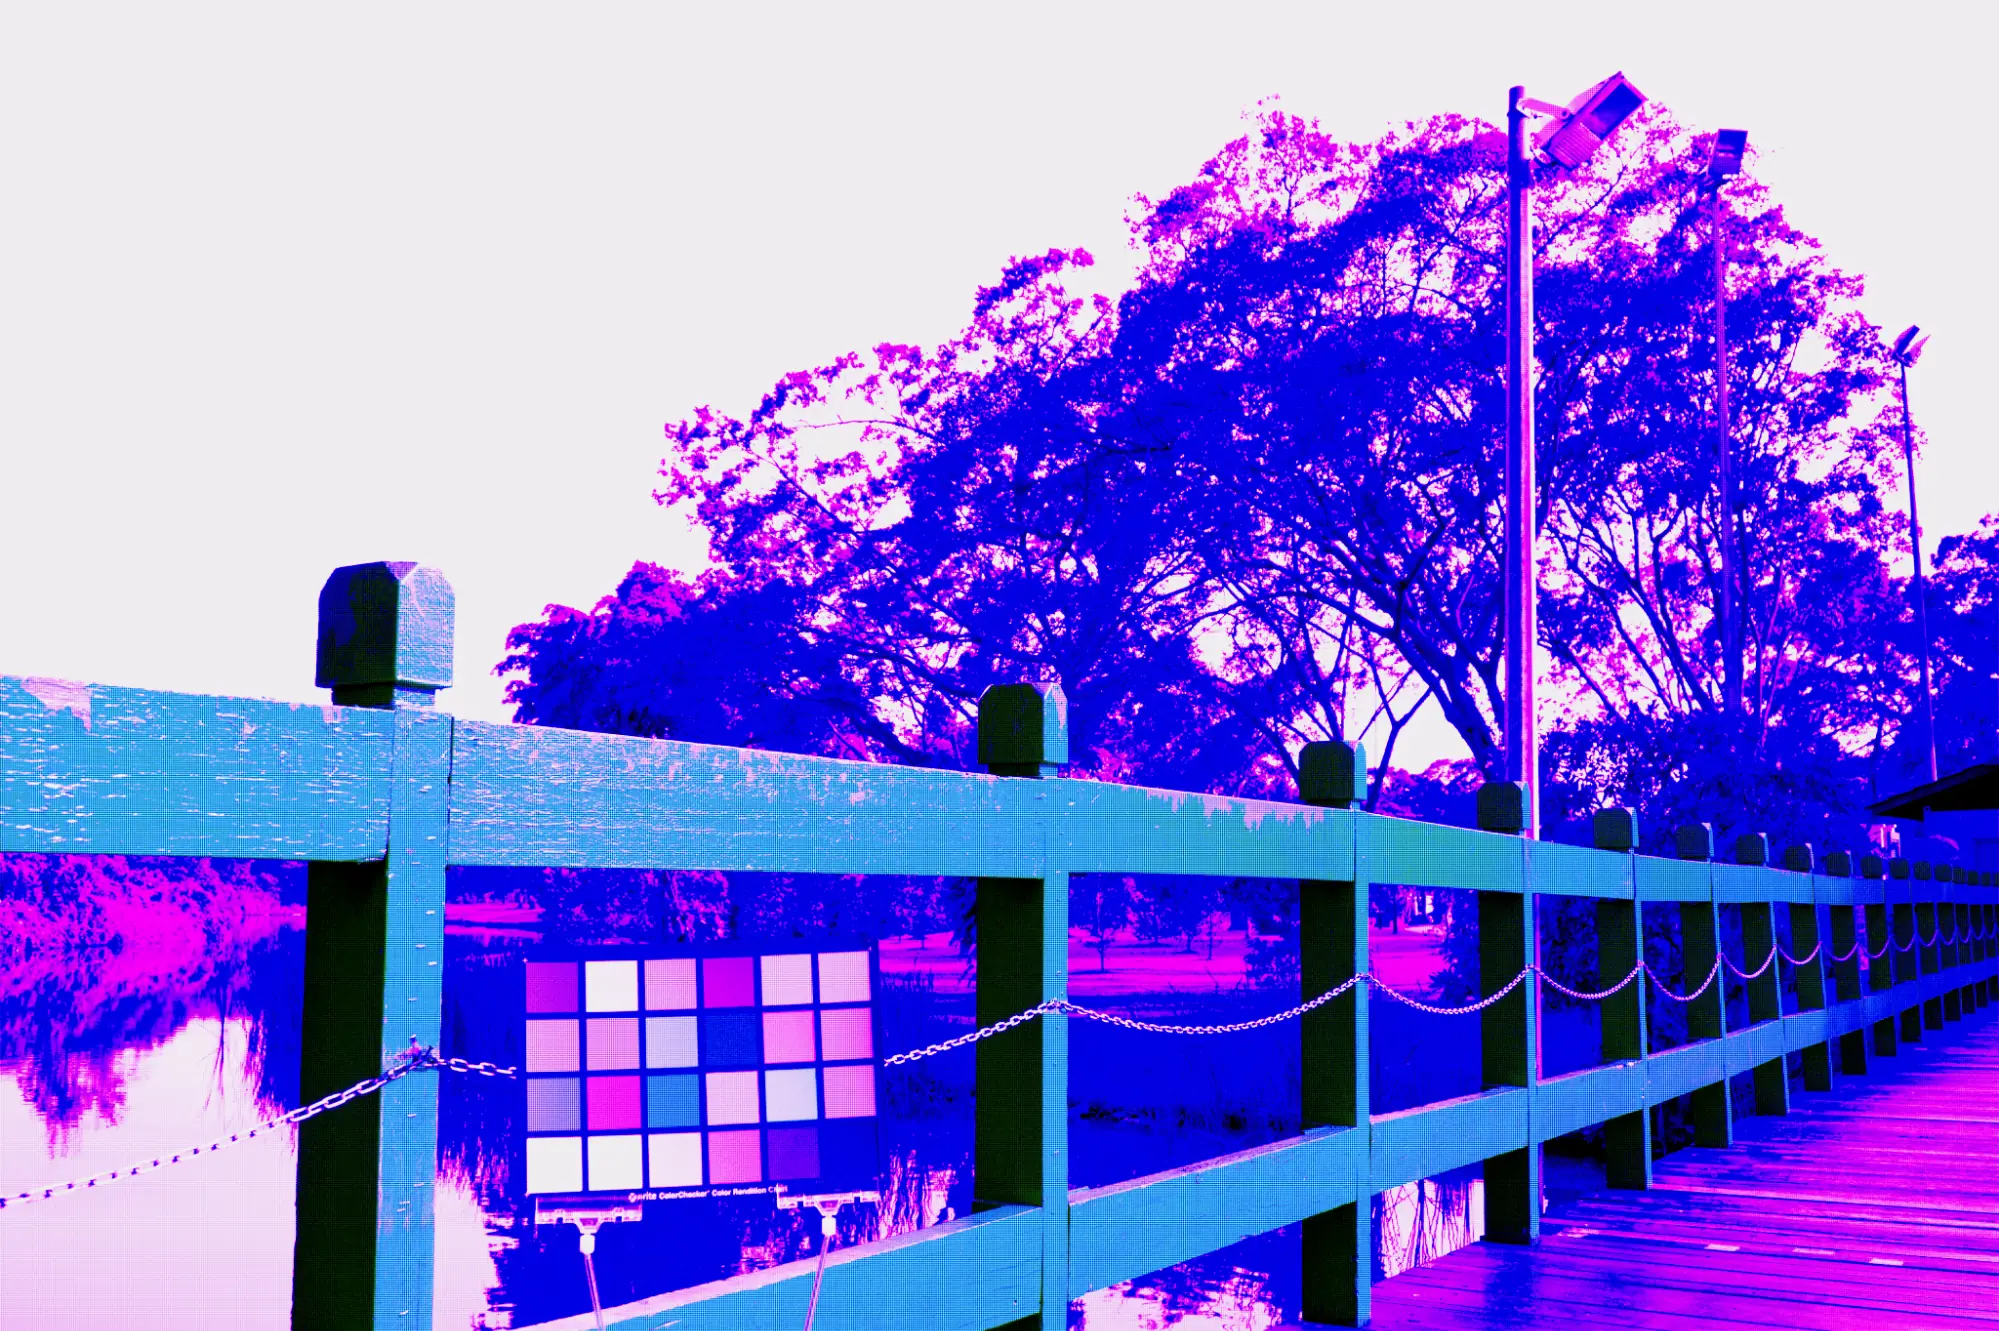
The results presented below clearly demonstrate the significance of parameter tuning in raw image processing.

The 3A Render Mode adjusts the ISP Digital Gain and WB Gains in each consecutive run until no further improvement can be made. The image below demonstrates how these updations can be tracked using the output logs printed in the terminal.
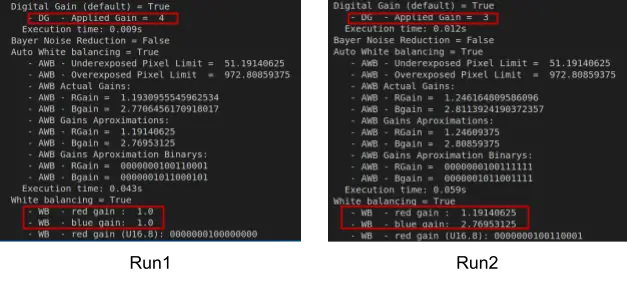
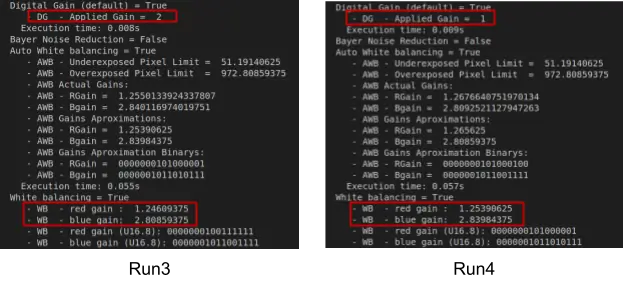
We get an output image once convergence happens i.e. no further improvement is observed in parameter estimation.
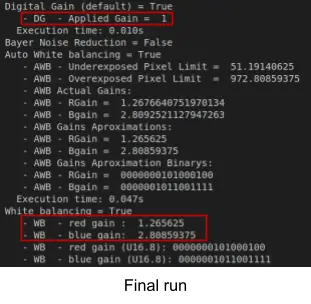
Infinite-ISP execution logs for the last iteration (convergence)
Raw Dataset Processing
You can use Infinite-ISP to process an entire dataset of RAW images. Currently the following image sensor RAW file formats are supported by the Infinite-ISP:
- RAW: A file format that captures all image data recorded by the camera’s sensor, unprocessed and uncompressed.
- NEF: Nikon’s proprietary RAW image format, storing data as captured directly from the camera’s sensor.
- DNG: Digital Negative, an open RAW image format launched by Adobe for the purpose of standardizing and archiving digital images.
While processing files other than .raw files, the sensor specific information such as image dimension, bayer pattern and bit depth, is extracted from the image metadata and is automatically updated in the config file under ‘sensor_info:’ heading.
Dataset Processing Approaches
Your dataset is a directory containing some input files (with supported file formats). You can either process this data using the same parameter configuration for all input files or provide a custom parameter configuration for each of the input files as shown below

Approach 1: Single Config - Multi RAW
Infinite-ISP will process all the RAW images of the dataset using the same config.yml. Simply update the default config provided in the ./config directory and place it alongside your raw files.
Approach 2: Multi Config - Multi RAW
Approach 2 involves Infinite-ISP processing each RAW image of the dataset using its own ISP pipeline configuration file ‘config.yaml’.
Follow the steps given below to create a config file specific to each image sensor RAW:
- Copy the default config file in your data directory
- Rename the config file as: <img_name>-configs
- Update the parameter configuration according to the image
- Following the same steps, add a config file for each image in your dataset
The script ./isp_pipeline_multiple_images.py has already been configured to process the sample data provided in ./in_frames/data directory but you can also configure the variables in the python script ./isp_pipeline_multiple_images.py to process a dataset on your local computer as explained next. For demonstration of Infinite-ISP processing a dataset of RAW images, we select the publicly available Colour Constancy Dataset (courtesy of Dongliang Cheng Dilip K. Prasad and Michael S. Brown). This dataset is an excellent collection of RAW images captured for a variety of scenes from different cameras (image sensors).
Colour Constancy Dataset: Processing Nikon D5200 RAW
Our demonstration covers the processing of a dataset of just 3 NEF files taken from the Colour Constancy Dataset using Approach 1. You can obviously process a dataset consisting of any number of images with Infinite-ISP following our demonstrated approach.
- Download dataset from the provided link or add your dataset as a submodule if it is present on a git repository (see heading “Dataset as a submodule”).
- Copy and paste the default config from ./config directory in your data directory (processing dataset using Approach 1).
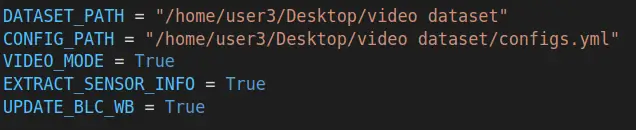
- Configure script parameters
- Update the DATASET_PATH variable by providing the absolute path to the downloaded dataset.
- Update the CONFIG_PATH variable which defines your default configuration which is used in case an image-specific config file is not provided with the image.
- Set VIDEO_MODE to false to process each image independently.
- Set EXTRACT_SENSOR_INFO to False so the script can update the sensor info automatically for the NEF file being processed.
- Set UPDATE_BLC_WB flag to True so the offsets and gains are updated automatically using the image metadata
- Now simply run the isp_pipeline_multiple_images.py file. Upon execution, the generated output files are placed in the ./out_frames directory along with a copy of the config file used to generate the resultant image.

The image quality for the processed output is very low. The color processing is off by a great margin. This is because we have not tuned the Infinite-ISP to use the Colour Correction Matrix and White Balance Gains suited to the image sensor of the dataset. Tuning the Infinite-ISP involves modifying the configs.yml file and finding out the appropriate values of parameters for different ISP blocks in the Infinite-ISP pipeline. The concepts and process of ISP Tuning for a new sensor is a dedicated effort in itself and we will cover it in a separate tutorial.
Submodule Dataset - Processing Dataset from another Git Repo
If your dataset is present on another git repository you can use it as a submodule by following the steps below.
- Open terminal and navigate to the cloned Infinite ISP repo.
cd <path_to_ISP_repo>- Add your dataset as a submodule
git submodule add <url> <path>- Update and initialize submodule
git submodule update --init --recursiveOnce you have successfully initialized your submodule, you follow the same step as above to process the dataset using Approach 1.
Working
The script iteratively processes each input file looking for a corresponding config file named <imagename>-configs.yml for each raw file. When a custom config file is not provided in the dataset, it falls back to utilizing the default config file. If single parameter configuration is used for all the input files i.e. using a single config file to process all input files, the code automatically updates the file-specified parameters in the config. For example, the file name is updated for .raw files and sensor info, BLC, and WB parameters are updated for .NEF and .dng files.
Tip: To save yourself from tuning the gain parameters for each image while processing a dataset, just enable the render-3A flag!
Video Processing Mode
Video Processing Mode emulates the ISP processing on a video stream i.e. a sequence of consecutive image sensor RAW frames. The Video Processing Mode of Infinite-ISP works in a very similar manner as the 3A Rendering Mode. In Video Processing Mode, the 3A feedback provided for one frame is applied onto the very next frame, which is different from 3A Rendering Mode (where 3A feedback is applied on the same frame until convergence). Video Processing Mode applies ISP processing on multiple consecutive RAW images, while 3A Rendering Mode works on a single RAW image.
As a video is a set of frames captured in sequence, a single ISP configuration file is used for Video Processing Mode. One thing you have to keep in mind is that you have to order your RAW frames / files by appending numerical tags at the end of the filename e.g. <filename>_001.
Burst Capture RAW Dataset: AR1335 3MP RAW
Burst Capture RAW Dataset is most suited for use with Infinite-ISP video processing mode and is available here. This dataset includes multiple consecutively captured RAW frames from AR1335 image sensor at a frame rate of 30 fps. The dataset encompasses multiple scenes with a Color Checker chart placed in view of the image sensor. A ISP pipeline parameter configuration file configs.yml tuned for AR1335 image sensor used for capture is also provided with the dataset and can be readily used to render the RAW images with Infinite-ISP.
Example
To process the Burst Capture RAW Dataset with Infinite-ISP, you first need to download it and then configure the script parameters in the isp_pipeline_multiple_images.py file as follows:
- Set VIDEO_MODE to True
- Set EXTRACT_SENSOR_INFO to True
- Set UPDATE_BLC_WB to True
After setting these parameters, execture the script to begin processing.

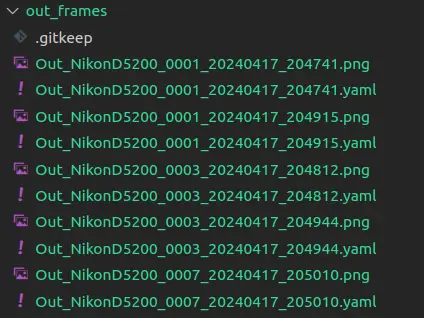
For the sake of demonstration, only 10 frames are processed which can be accessed in the ./out_frames directory.
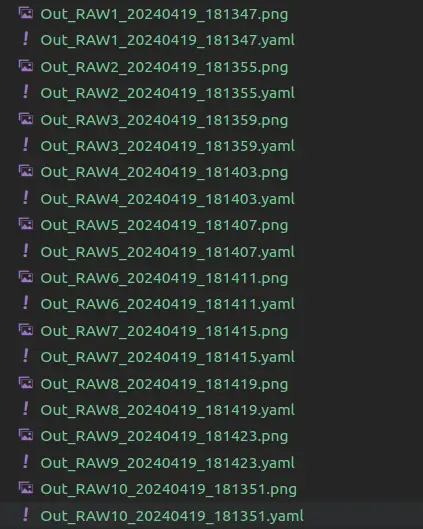
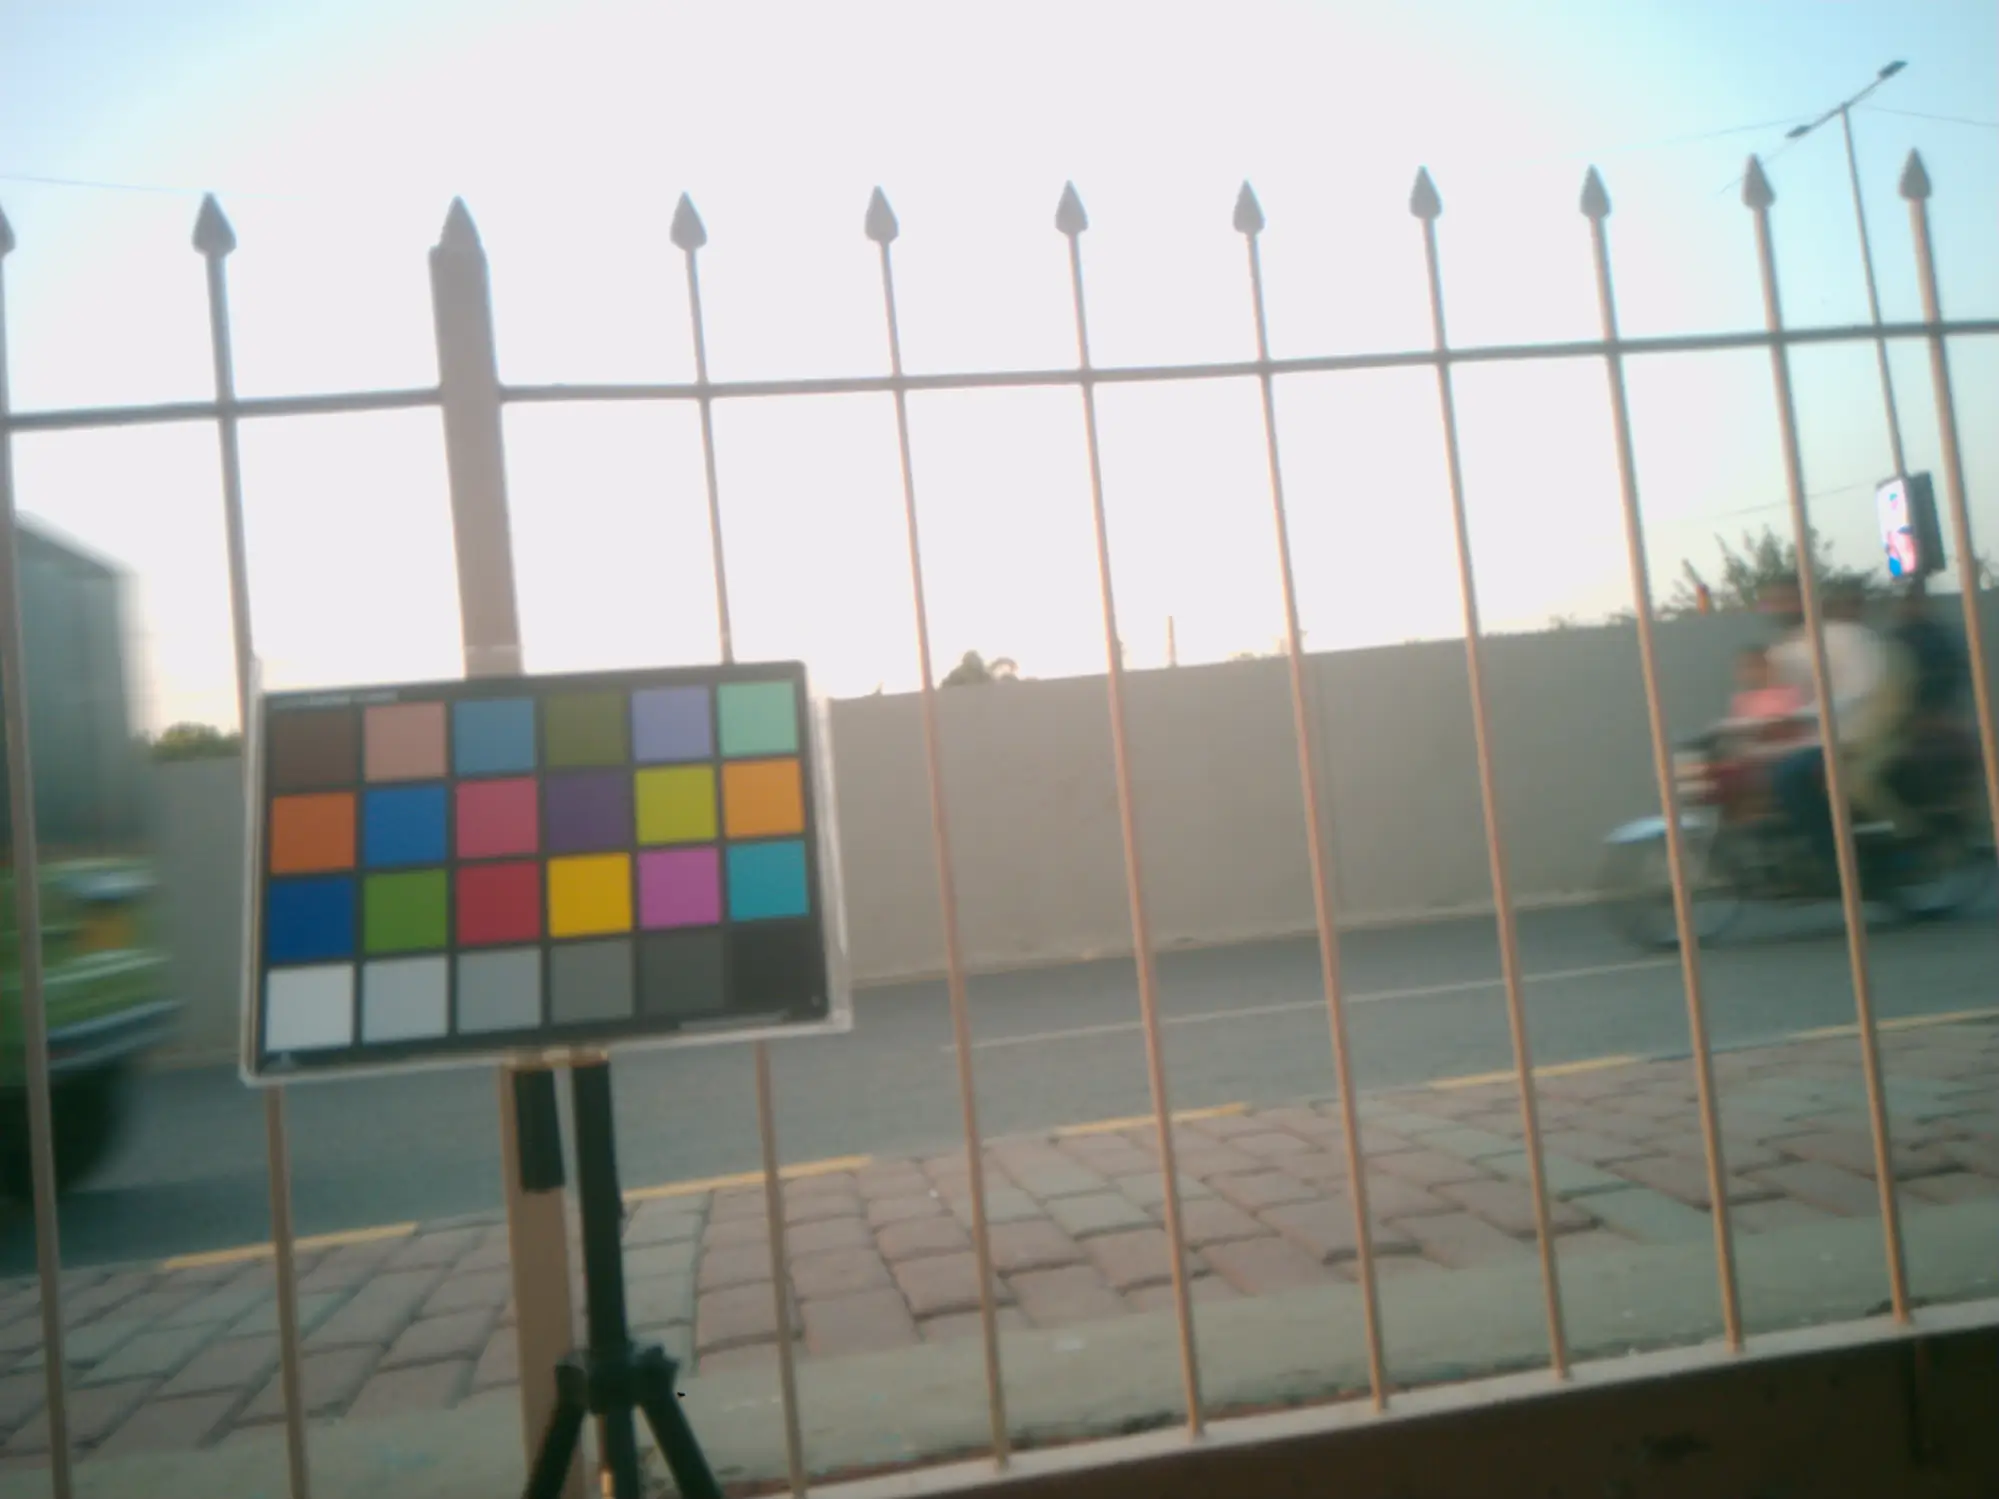
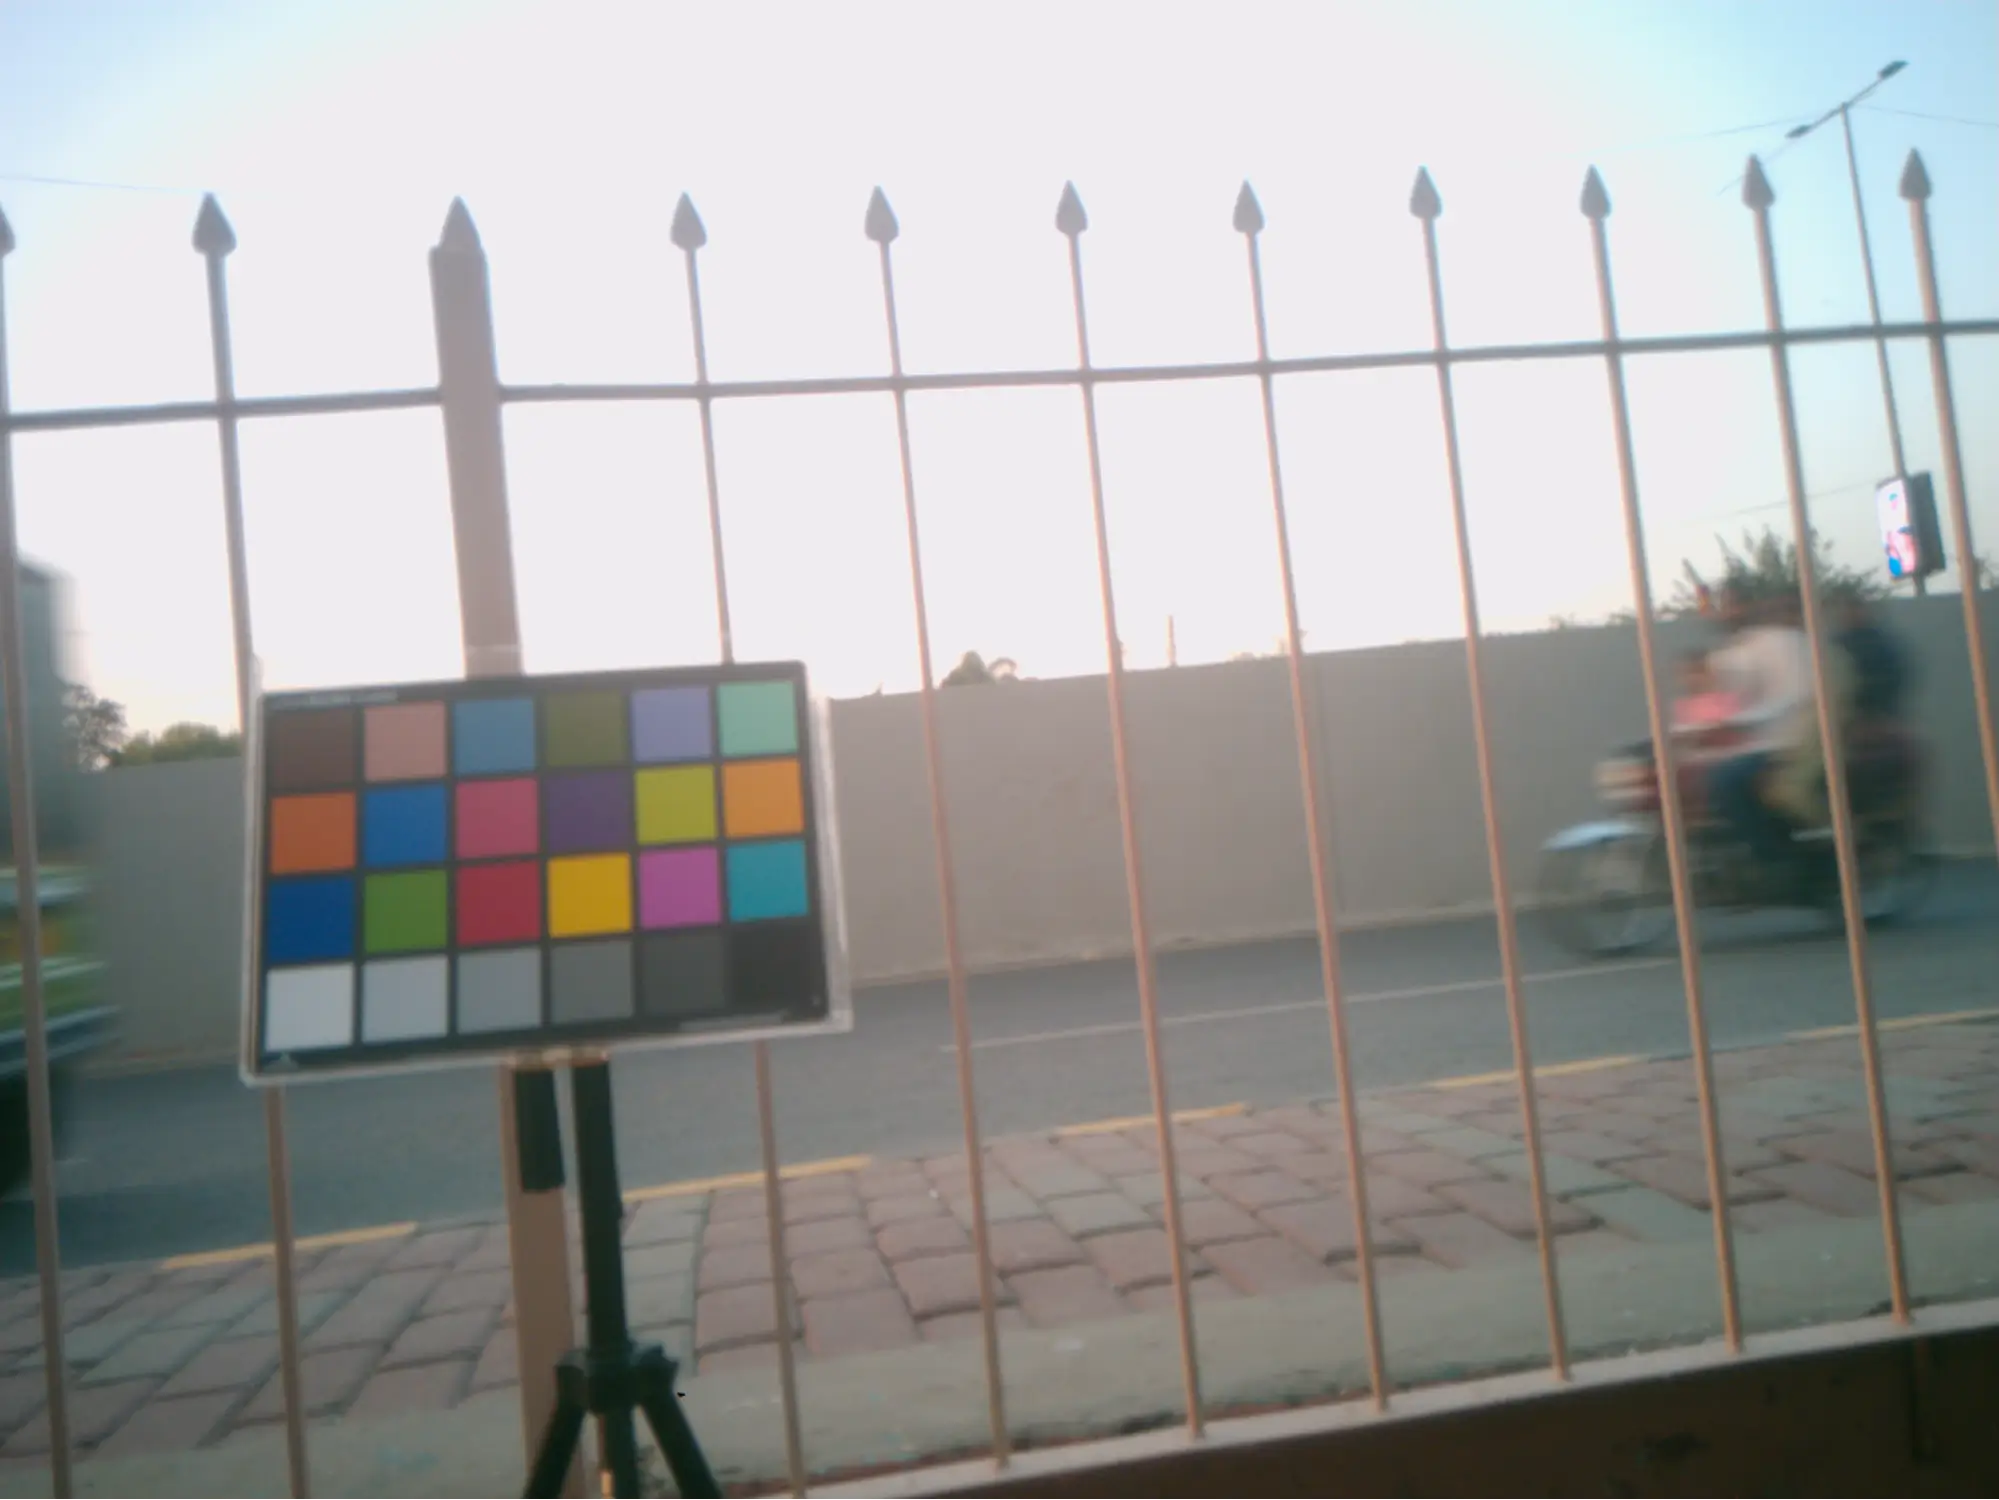
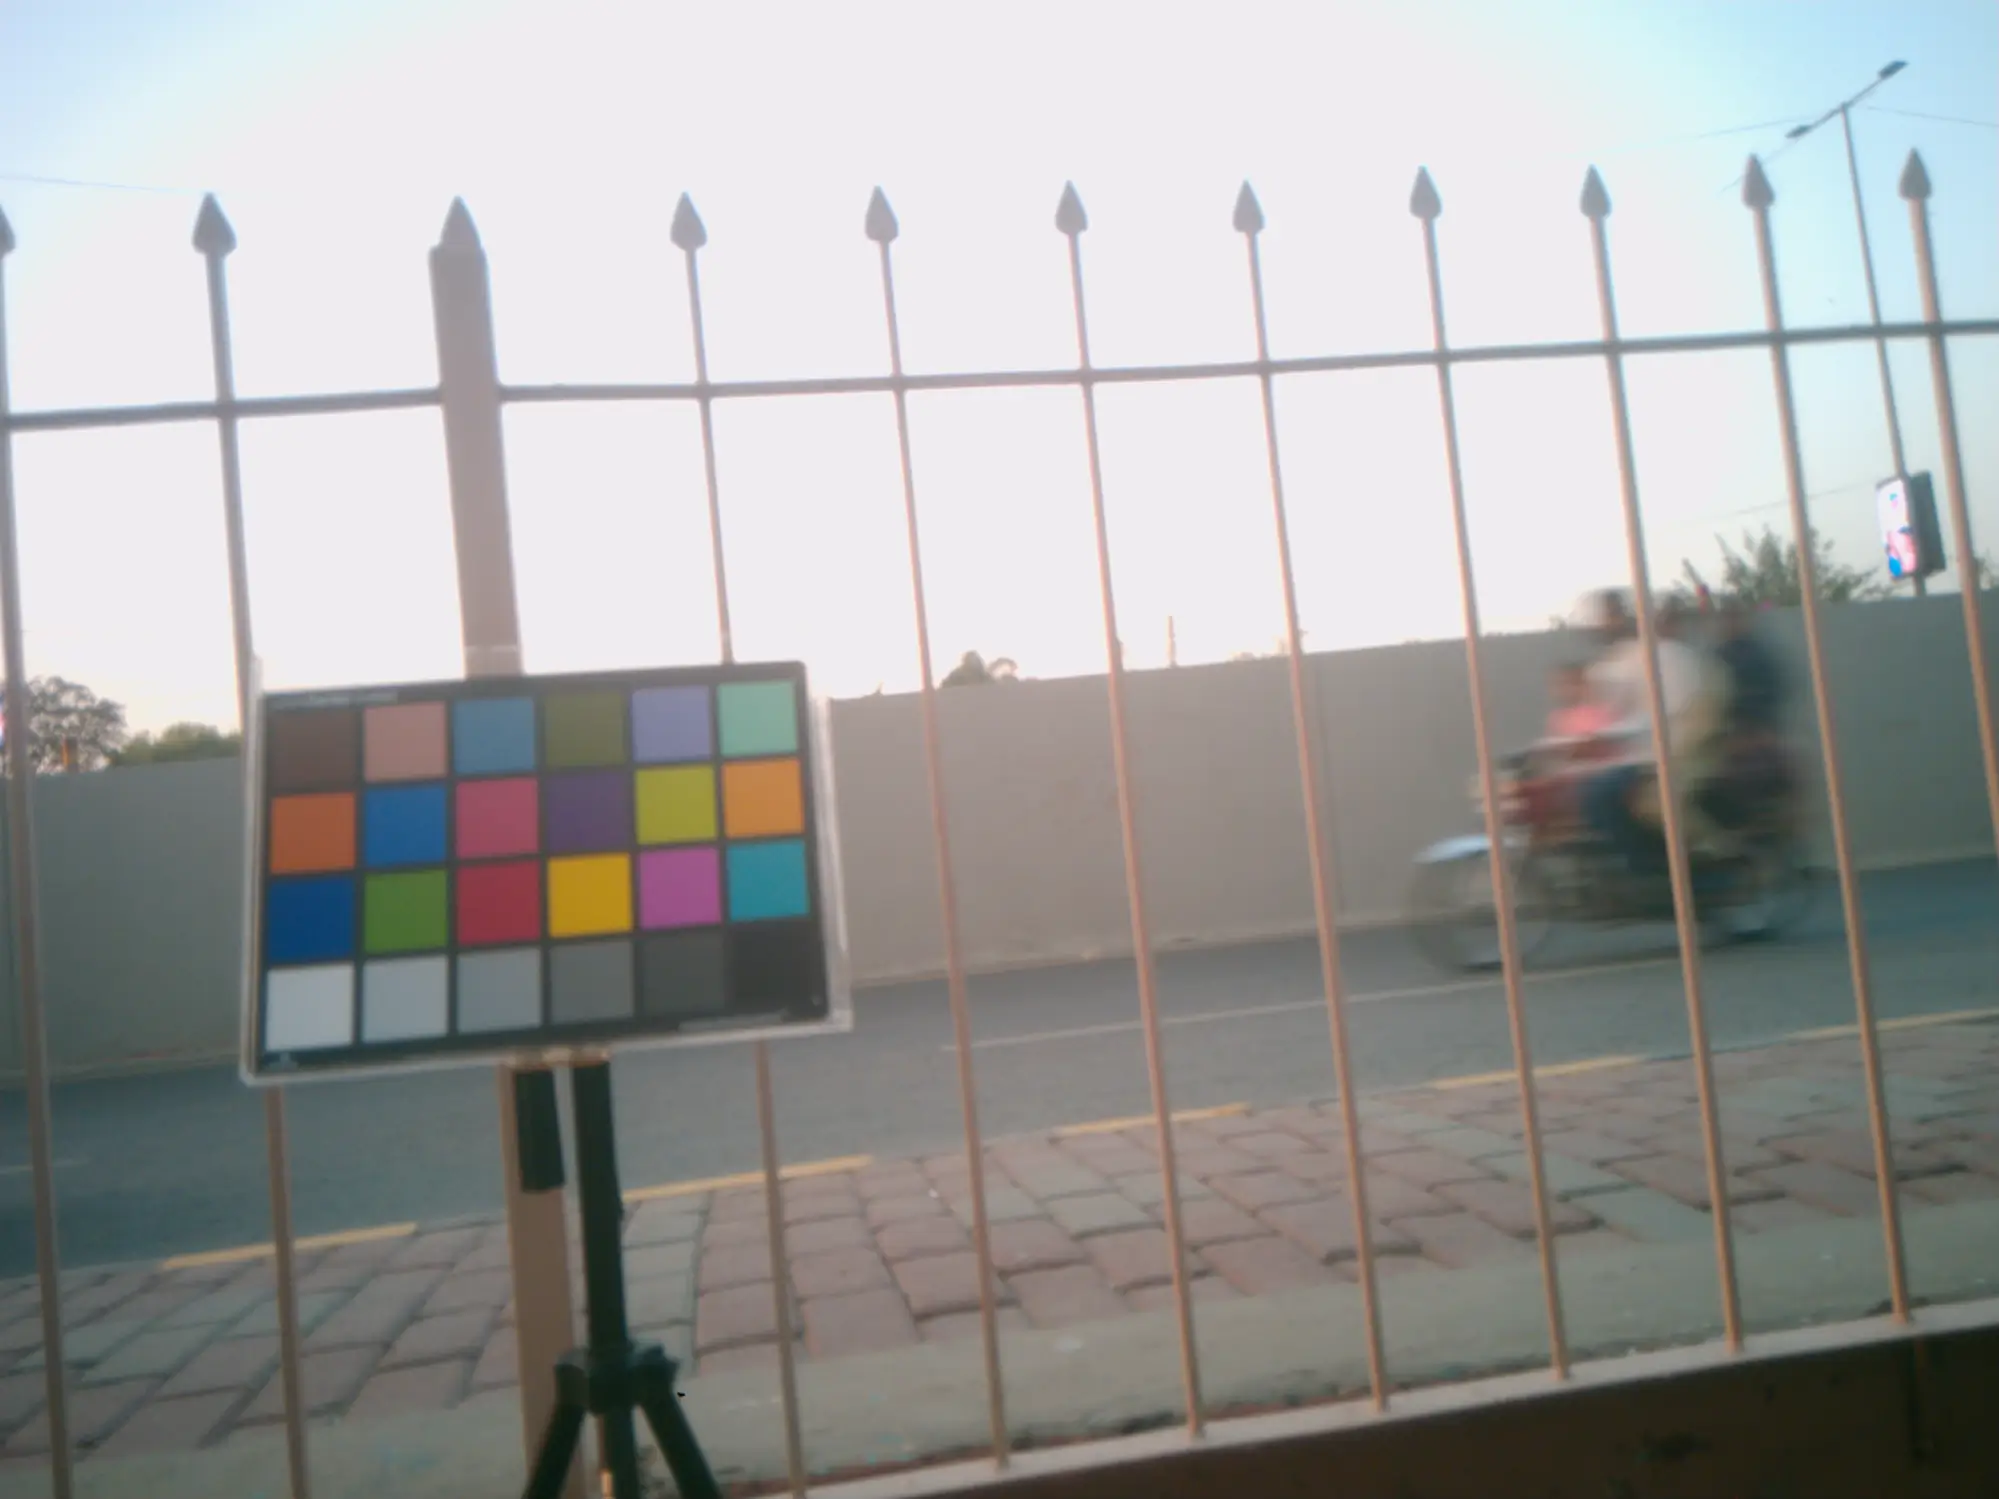
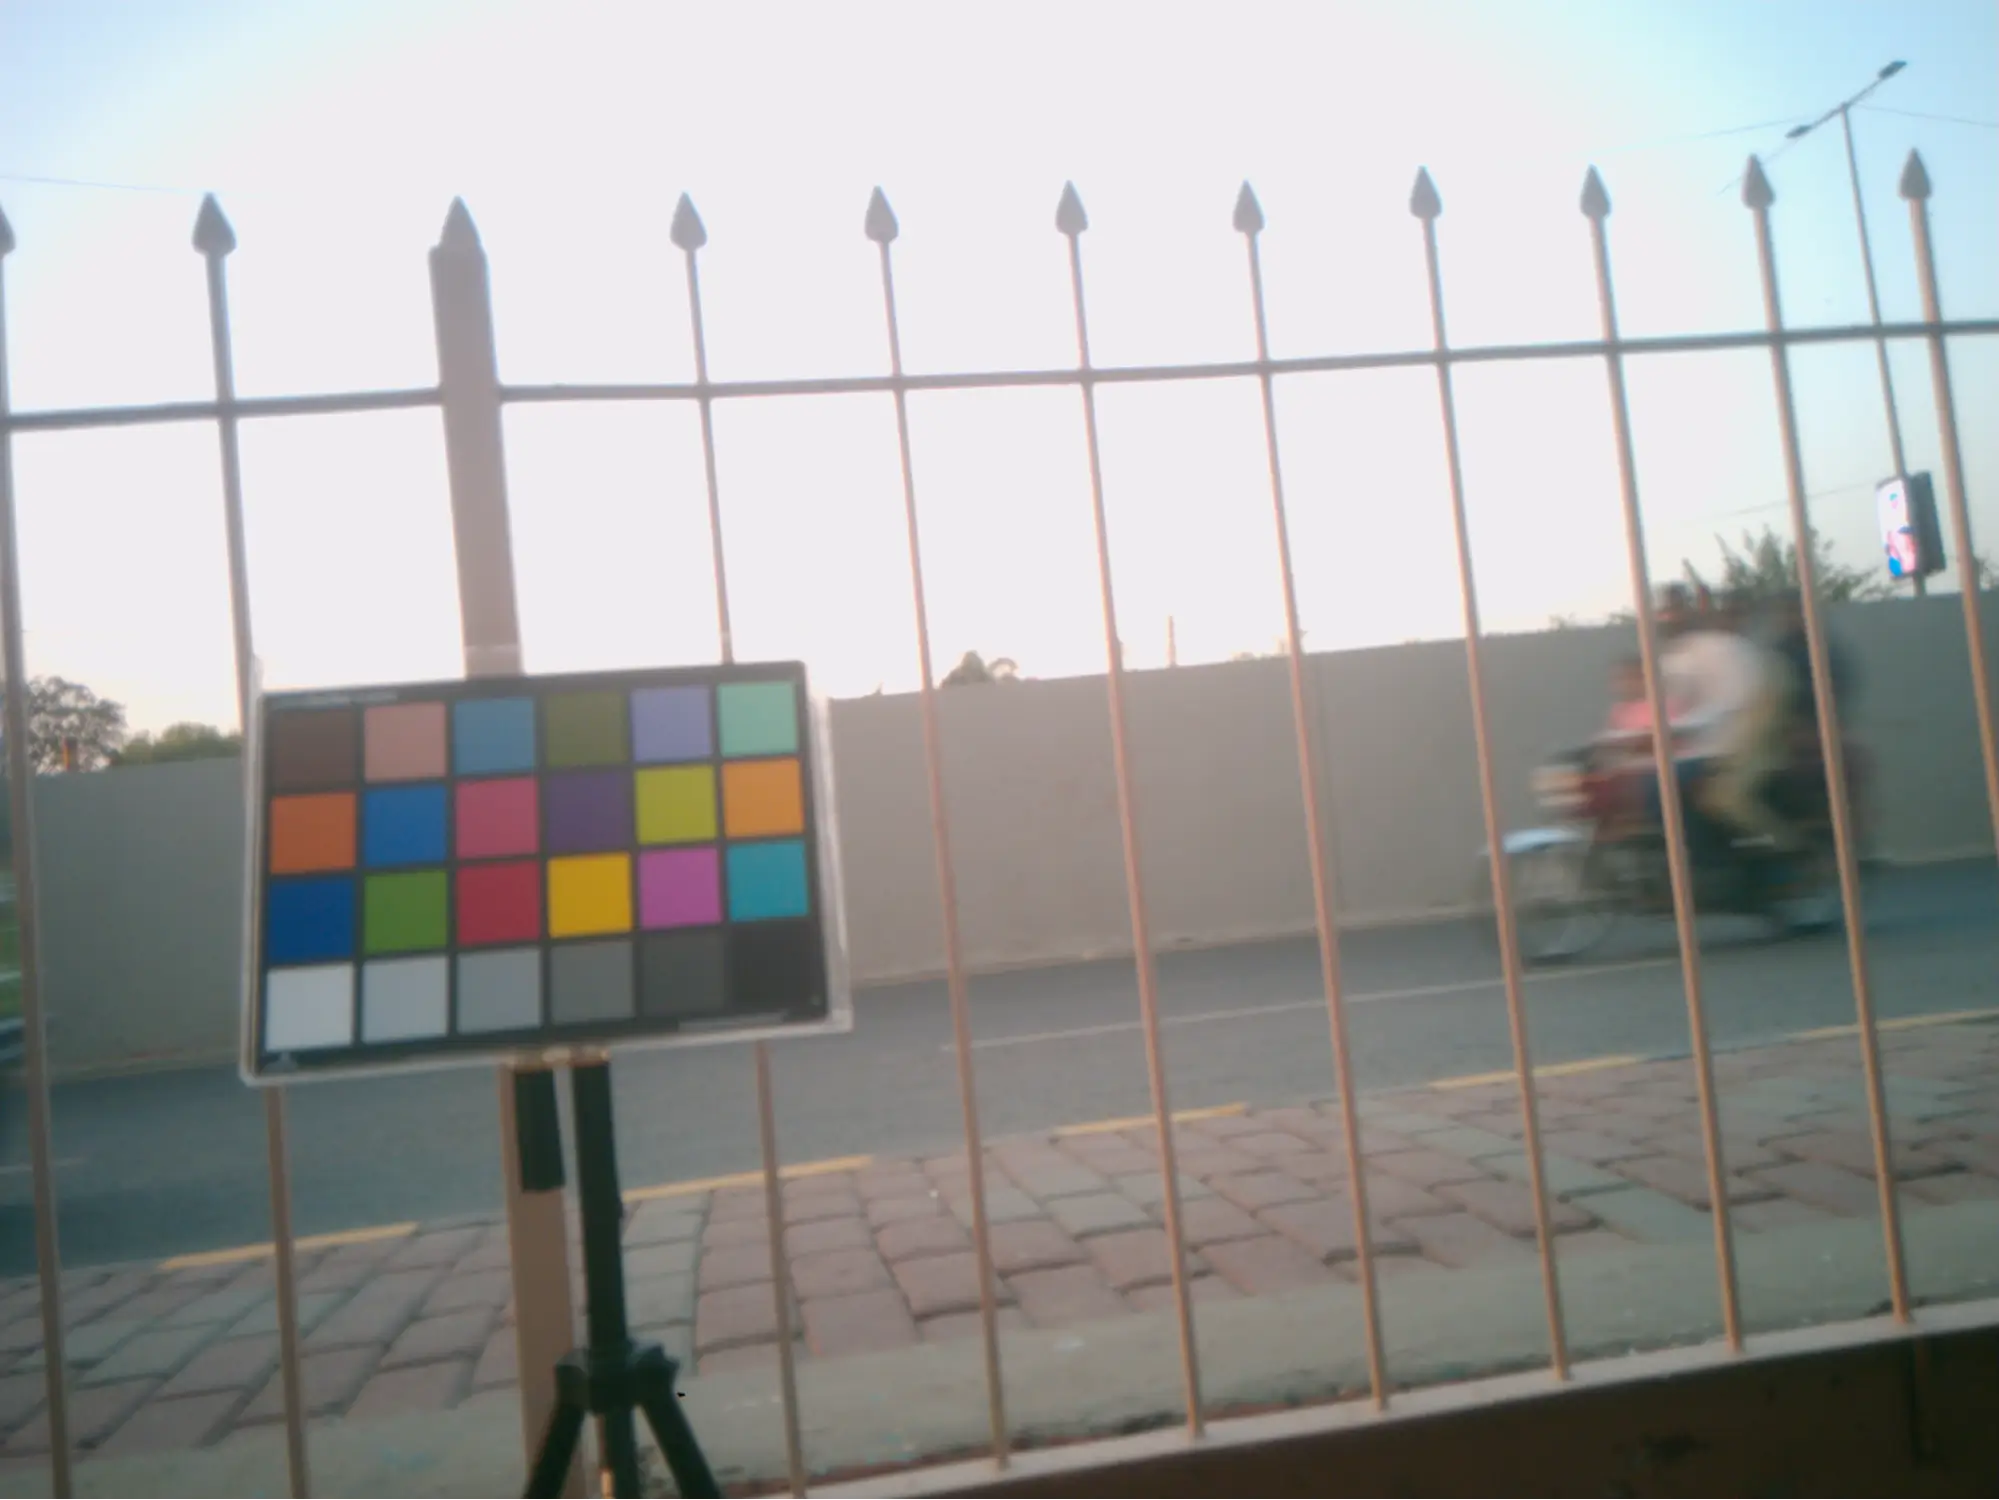
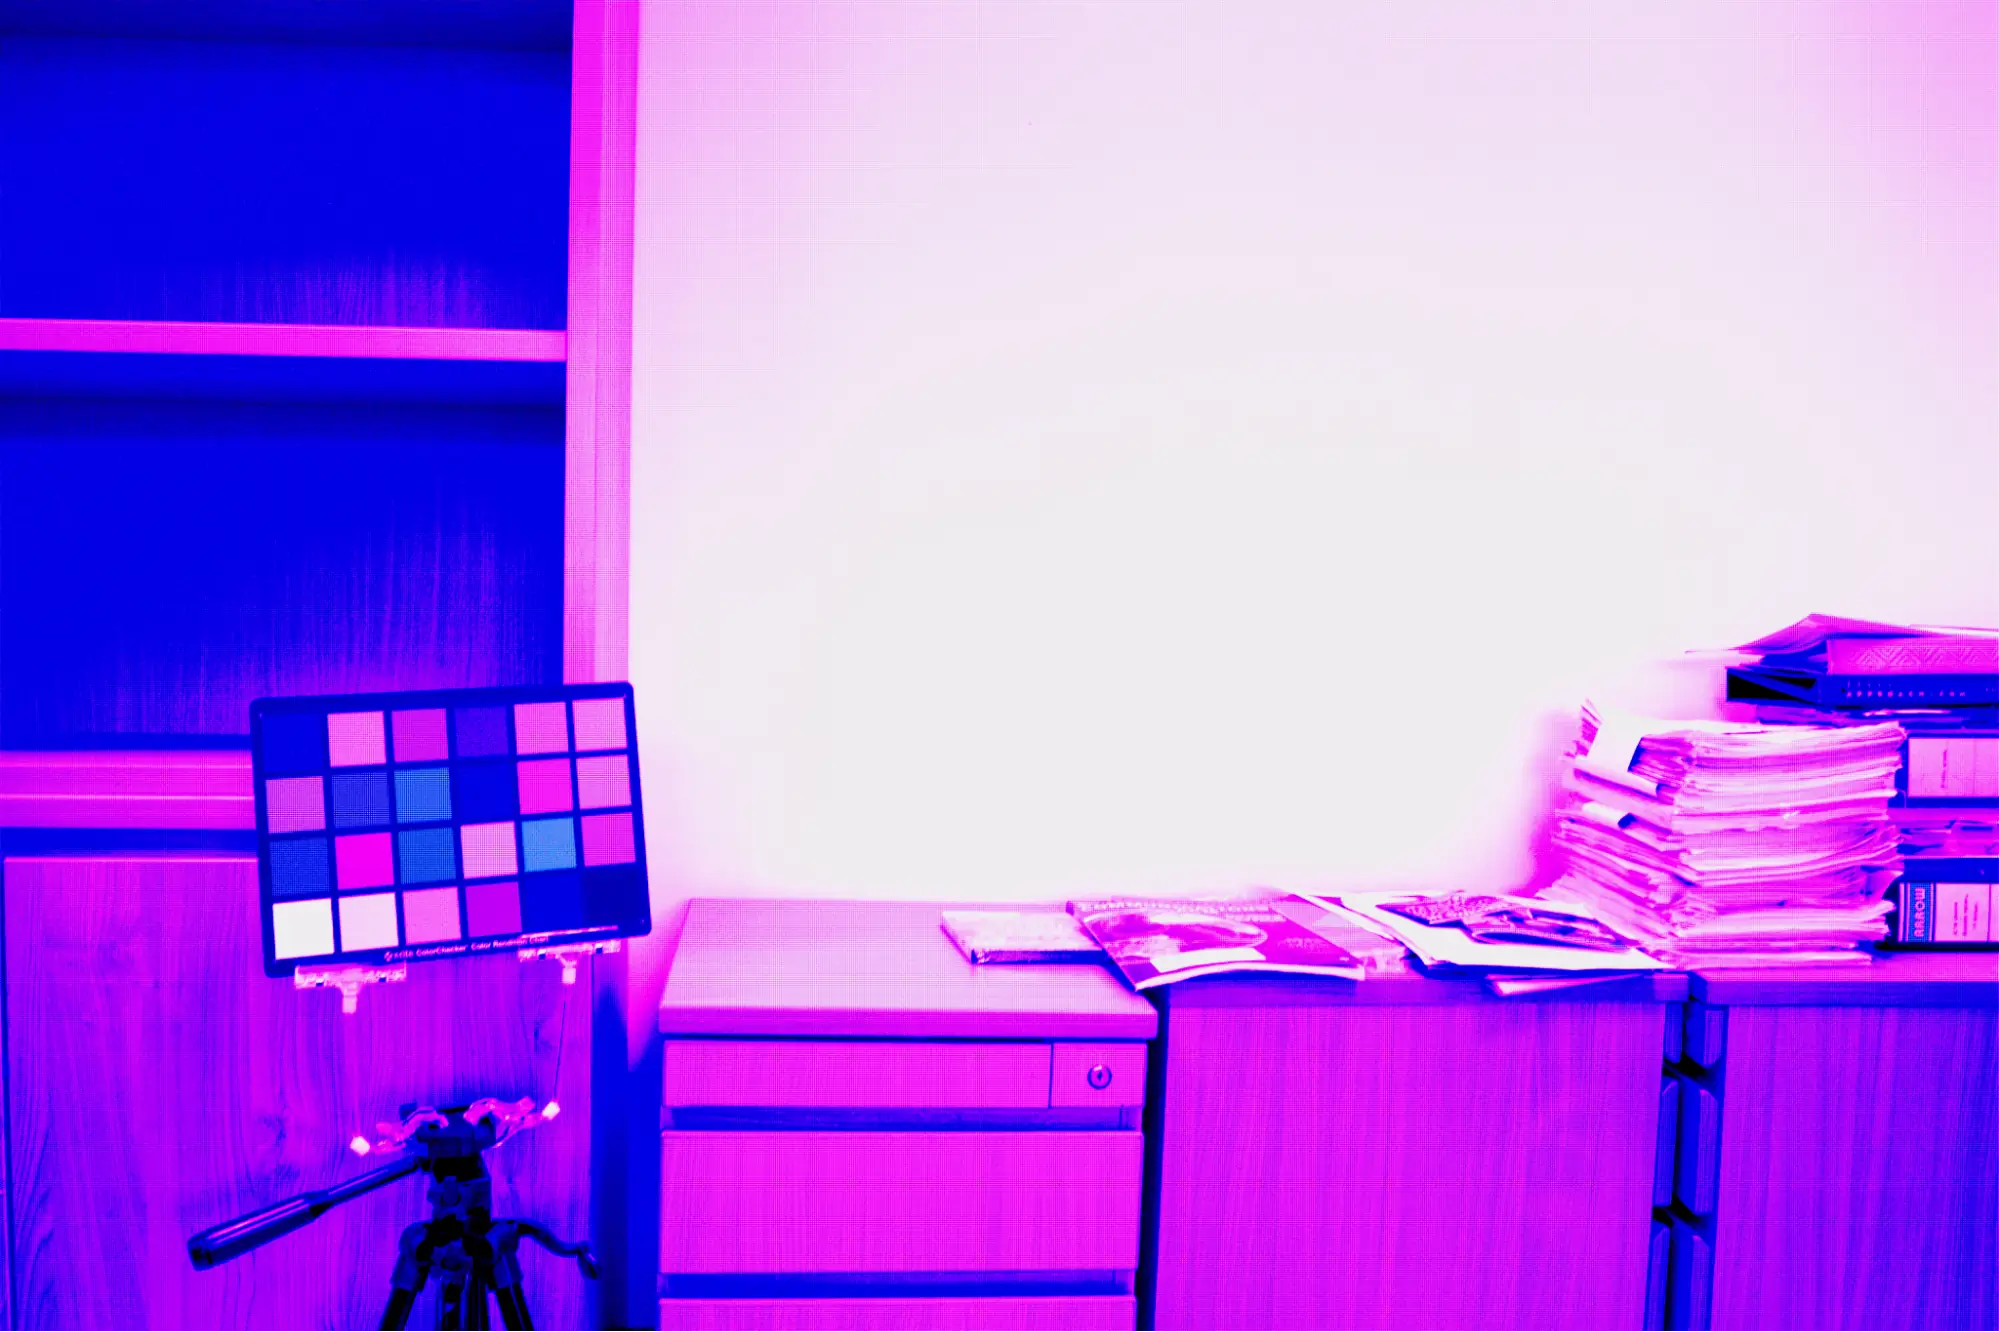
First 4 processed frames (.png files)
Conclusion
As we conclude this tutorial, you’ve acquired significant insight into Infinite-ISP’s capabilities and features such as 3A Rendering, Dataset Processing and Video Processing. However, guess what? There’s even more to discover! In our next tutorial, we will describe how to modify the Infinite-ISP pipeline and add a new algorithm block into it, enhancing the overall processing and output image quality of the ISP.